> For the complete documentation index, see [llms.txt](https://doc.newshour.mrb-lab.com/llms.txt). Markdown versions of documentation pages are available by appending `.md` to page URLs; this page is available as [Markdown](https://doc.newshour.mrb-lab.com/in-app-purchase-setup/17.-subscriptions-setup/17.1-android-setup.md).
# 17.1 Android Setup
## Setup Payment Profile
From your **Google Developer Console Account > Setup > Payment Profile**, you need to add your payment profile. Like adding your bank account. If you have already added that, you can ignore it.
## License Testing Setup
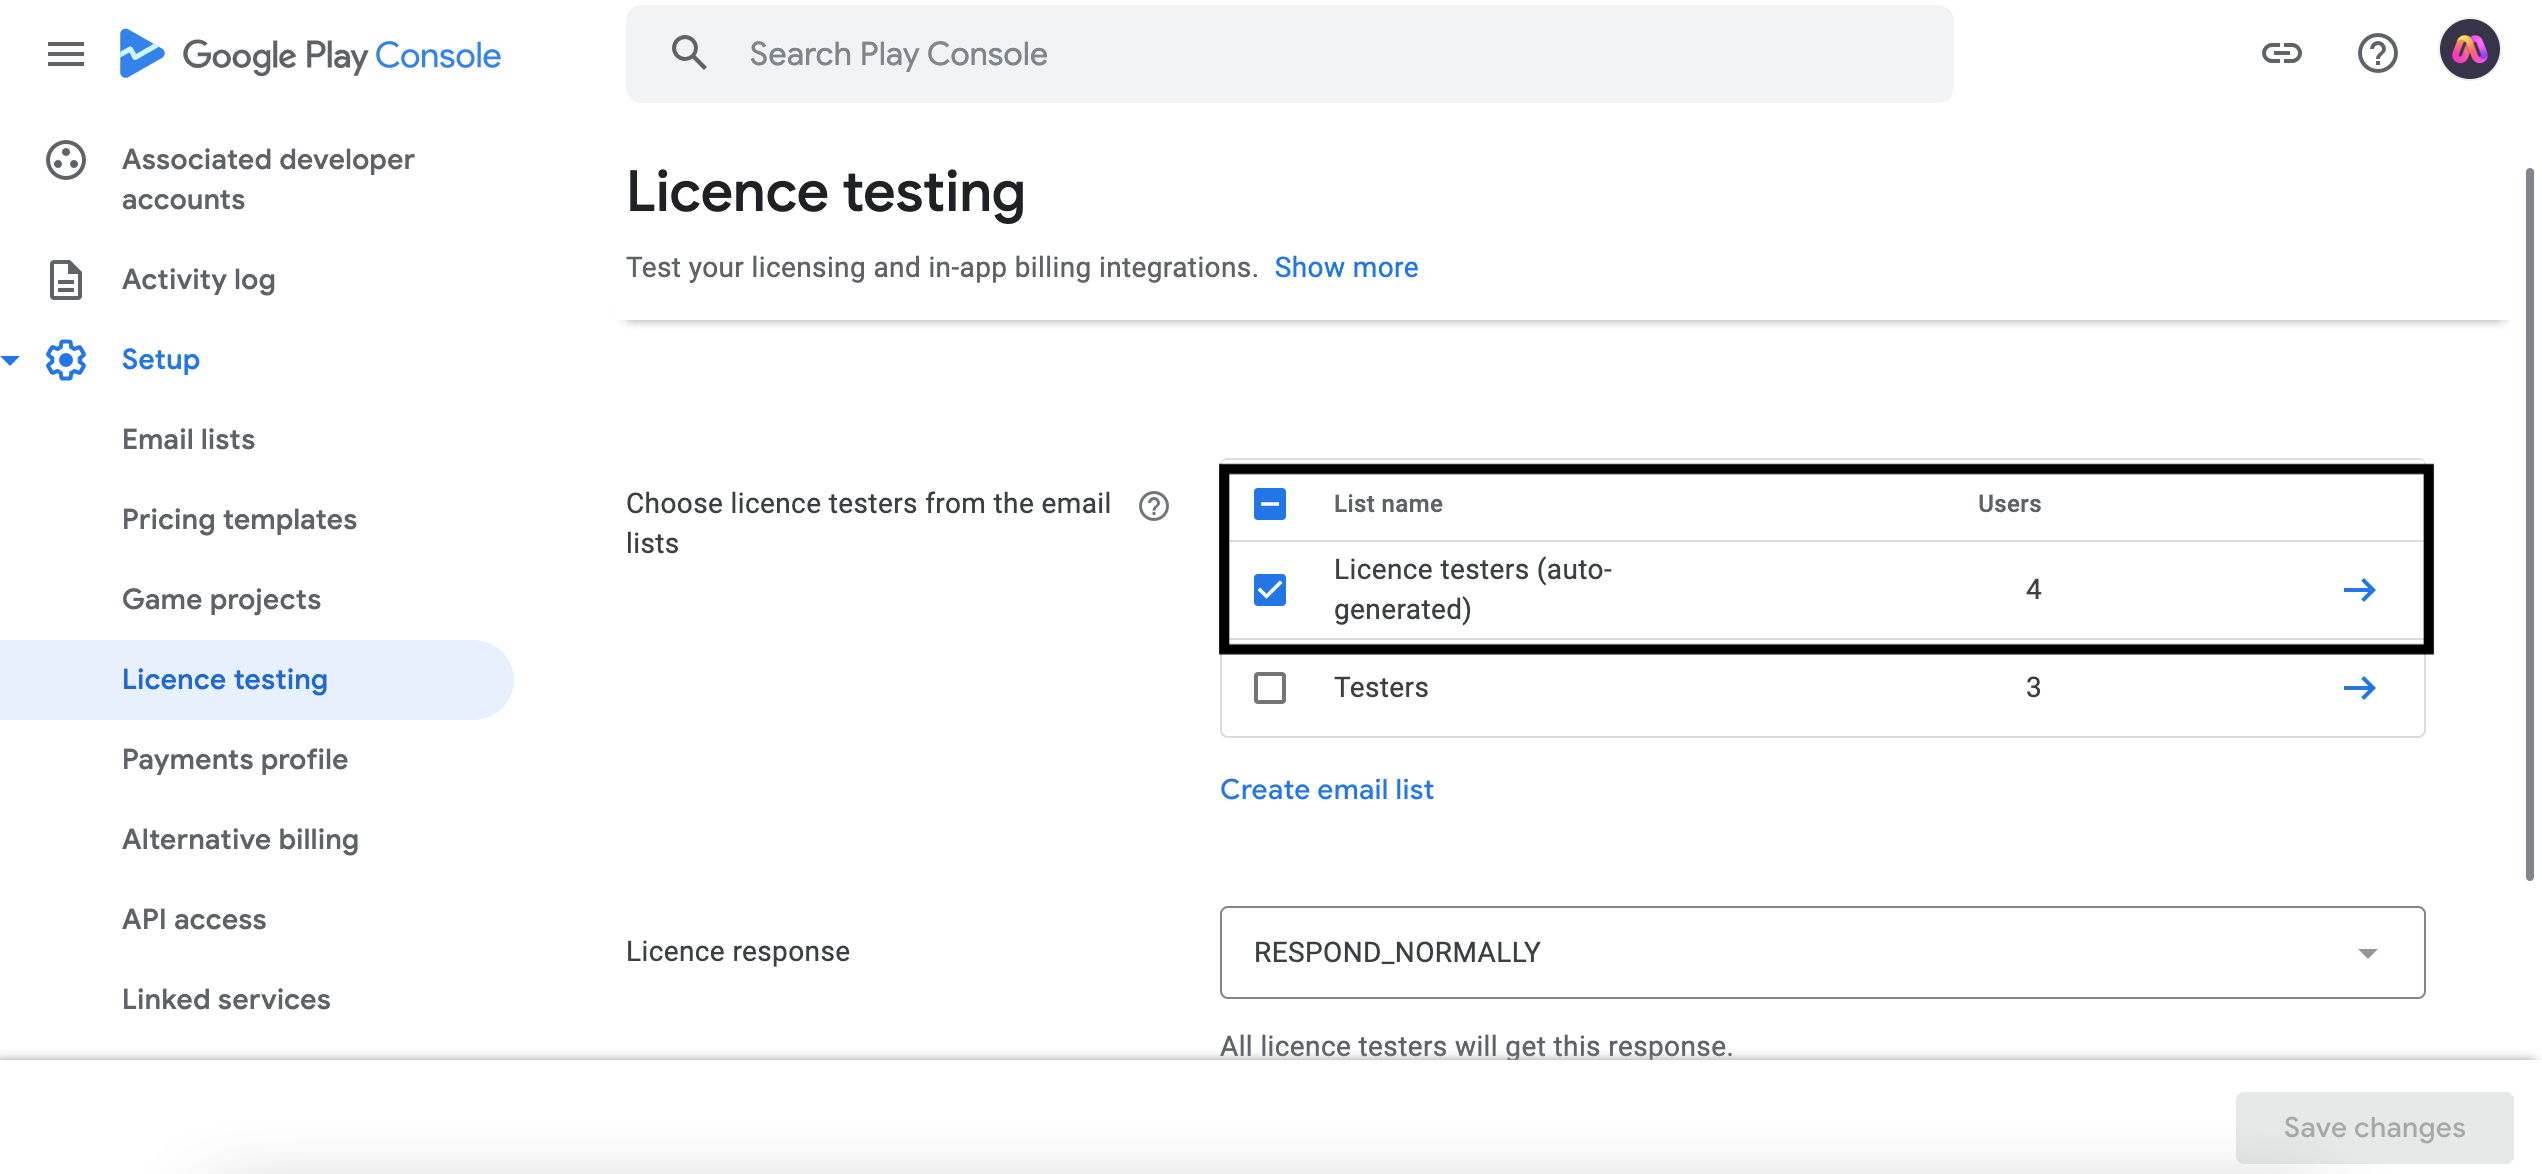
In this step, you need to add some **testers** who can test the IAP product in the app and purchase points without any real payment.
**From your Google Developer Console Account > Setup > License testing**, Add some email addresses.
## Upload Initial Build at Google Play Store
To activate **IAP** for your app in the Google Play Store, you need to add the **billing permission** in the code section and upload an initial build at the Google Play Store as **Internal/Close Testing**. (Only the testers you will assign in the upcoming step can test the app). You shouldn't upload it on production.
{% hint style="info" %}
Choosing Internal testing is easier. You don't have to go through the review process and don't have to provide app meta details.
{% endhint %}
#### Add the Billing Permission
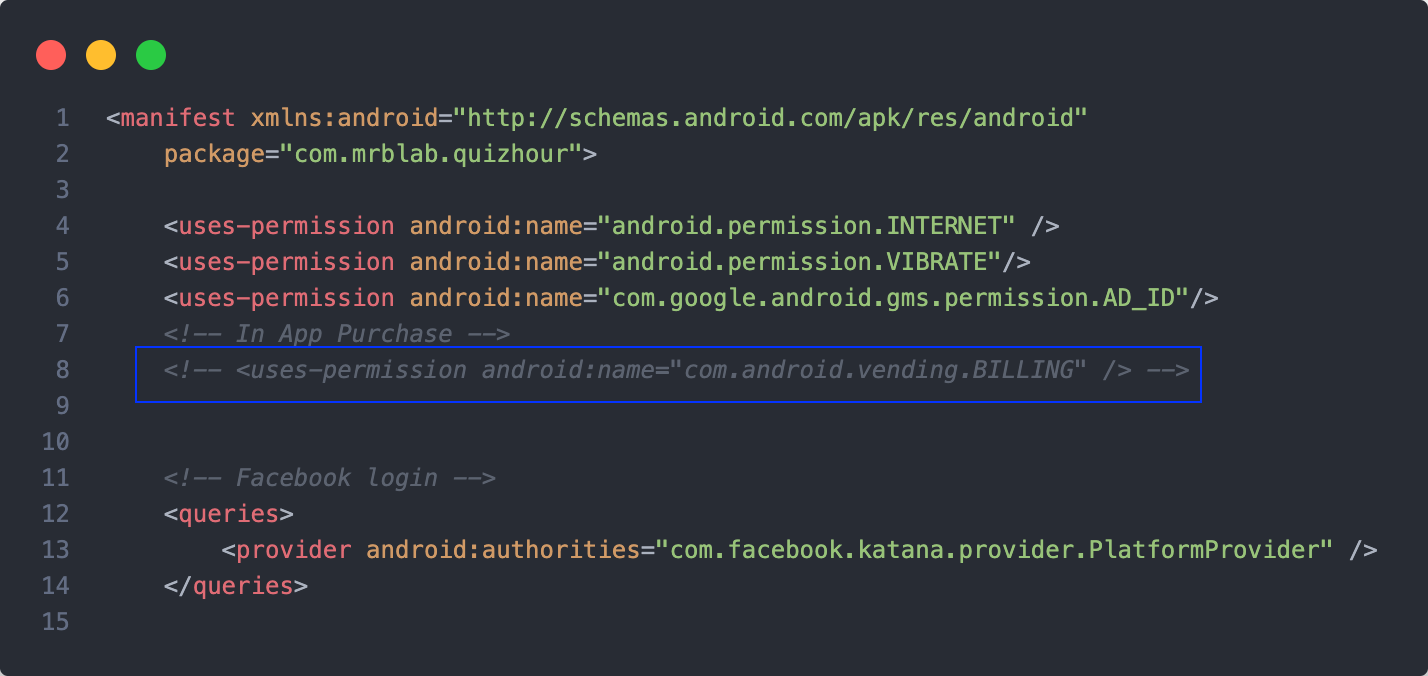
From the App source code, Go to the **lms\_app/android/app/src/main/AndroidManifest.xml** file and **enable** the selected line shown in the picture below. This permission will enable the billing and IAP at the Google Play Store.
{% hint style="info" %}
If you already uploaded your app in production and released it at the Google Play Store, you also need to follow the same step (Add billing permission and upload it as an Internal/Close Testing version).
{% endhint %}
Without uploading any new version in the **Internal/Closed Testing**, you won't see the IAP features.
{% hint style="info" %}
Before going to the next steps, make sure you have uploaded a new build in the Internal/Closed Testing and published it.
{% endhint %}
## Configure Subscriptions
After publishing a new version with Close testing, you will see the **Subscriptions** option on your app sidebar.
#### Create Subscriptions
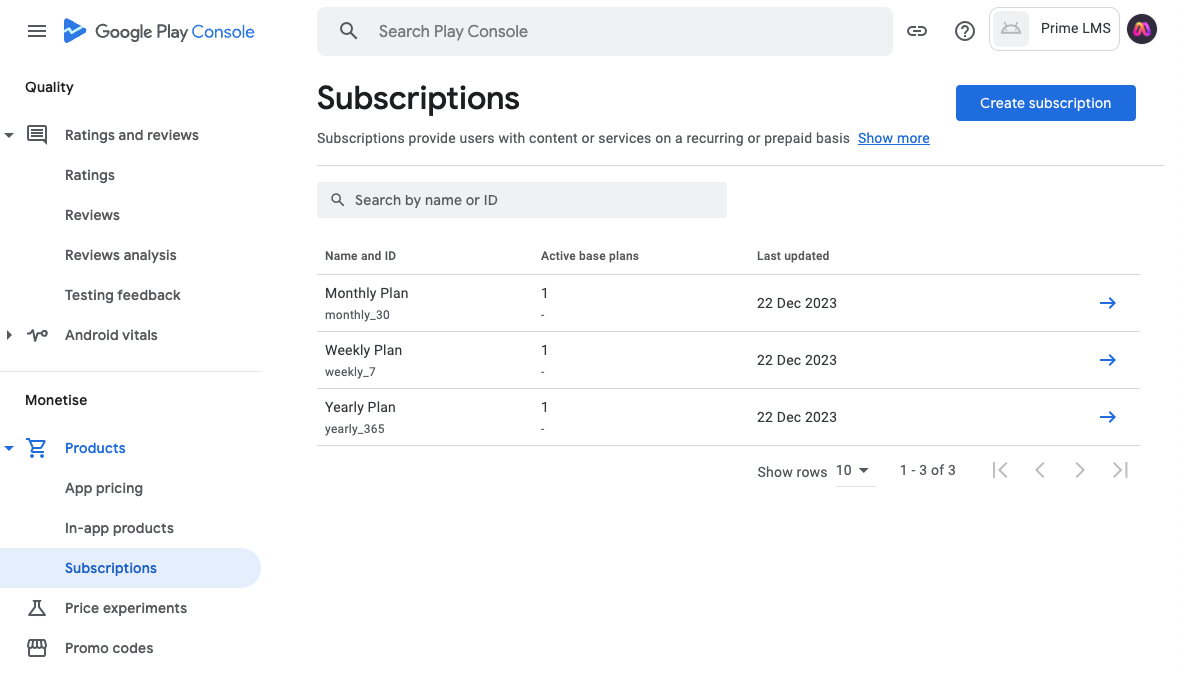
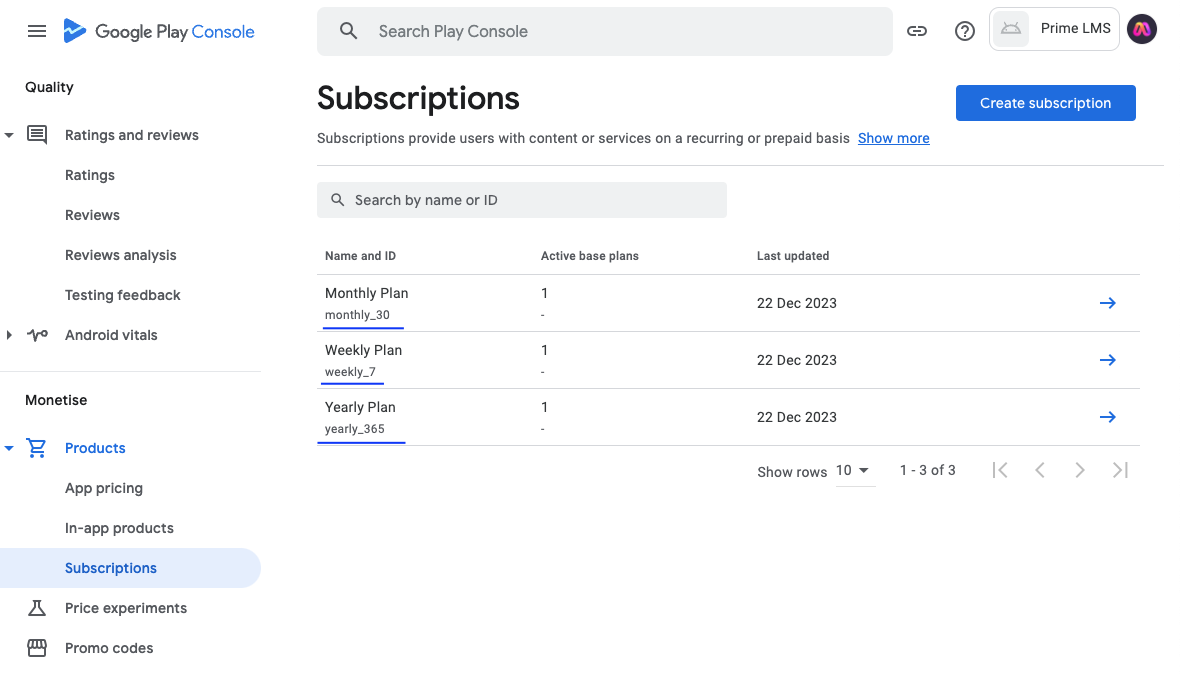
From **Your App > Monetize >** **Subscriptions**, create a subscription by clicking on the **Create Subscription** button.
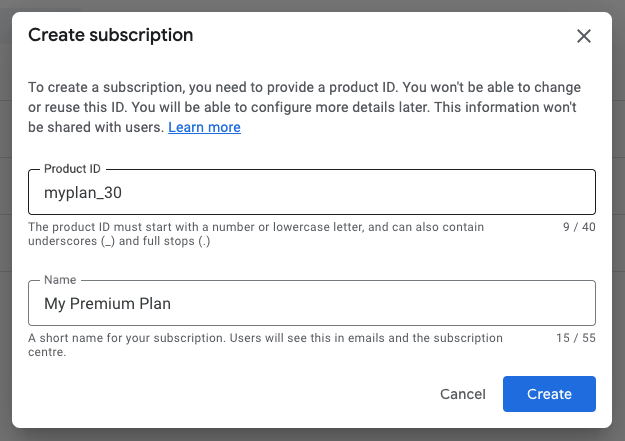
* Add **Product ID**.
{% hint style="info" %}
Product ID can be anything but unique. You must add the duration in days in your product ID. For example,
**myplan\_7** (for 7 days),
**myanotherplan\_30** (for 30 days)
{% endhint %}
{% hint style="danger" %}
You can't use any other number in your product ID except the days. Example,
**myplan1\_30, myplan2\_365**
This is not acceptable.
{% endhint %}
Look at the shown below, you will understand how to use product IDs.
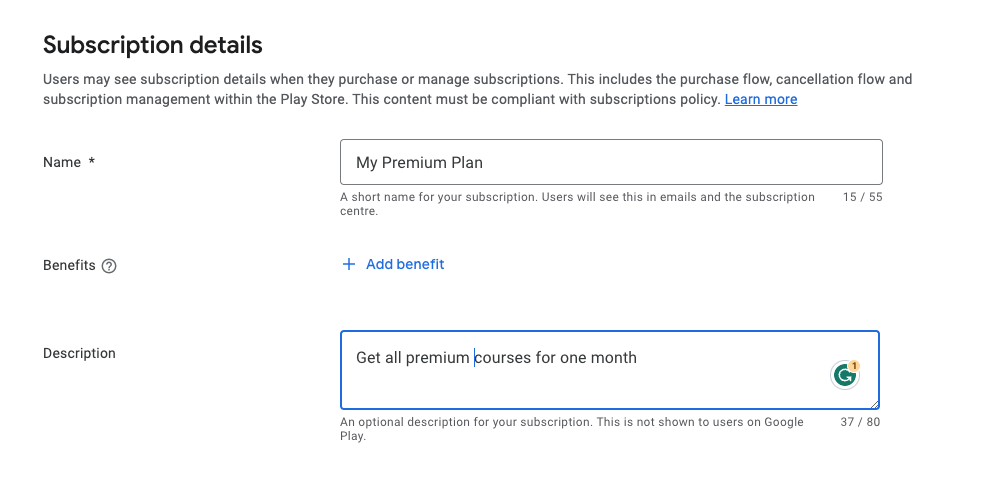
* Add **Product Name** which will be shown on the app.
* After creating the product, add subscription details > Description.
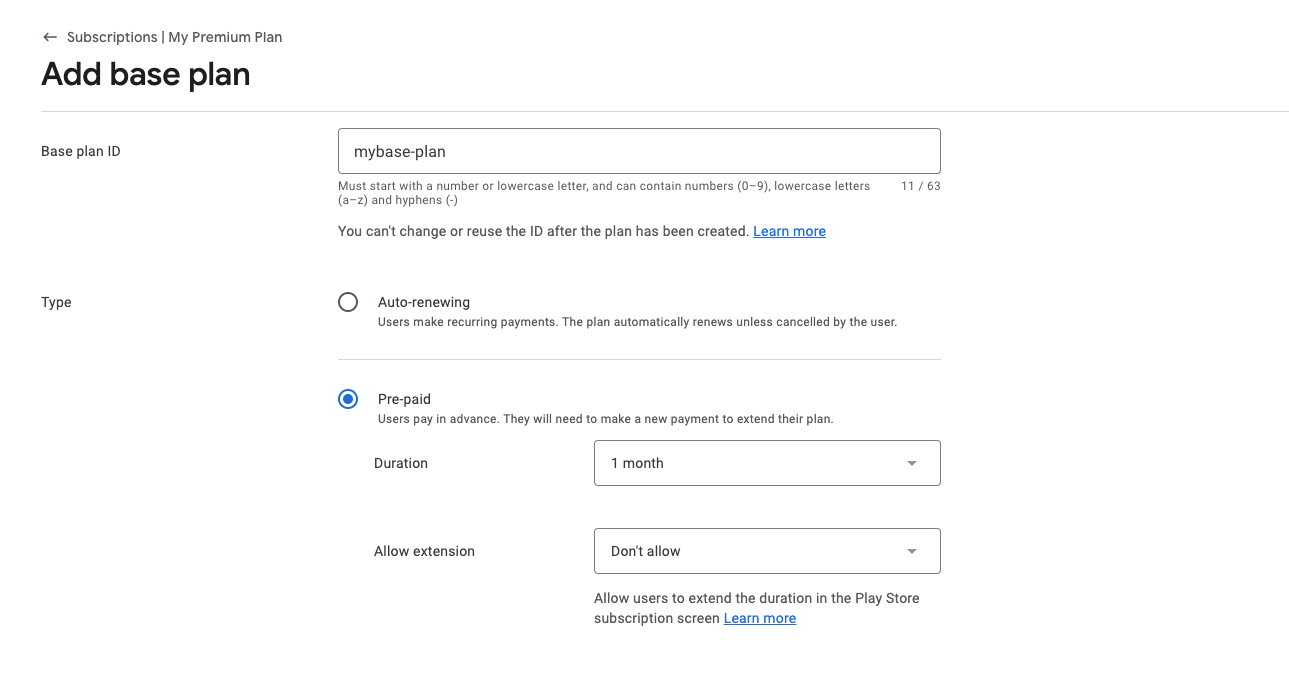
* Add base plan ID.
{% hint style="info" %}
You have to create a **base plan** for your product. You can create many base plans but only one will be active. A base plan ID can be anything but unique. No extra requirements for that.
{% endhint %}
* Select Type > Prepaid and select the plan duration.
{% hint style="danger" %}
Plan duration must be aligned with your product\_id. For example, if you select 1 week then your product ID must contain 7. If you select 1 month then your product ID must contain 30.
{% endhint %}
* Now save the base plan.
{% hint style="success" %}
That's it. Your first subscription plan has been created. This way you can create as many plans as you want. We have used 3 plans for our demo app.
{% endhint %}