> For the complete documentation index, see [llms.txt](https://doc.newshour.mrb-lab.com/llms.txt). Markdown versions of documentation pages are available by appending `.md` to page URLs; this page is available as [Markdown](https://doc.newshour.mrb-lab.com/in-app-purchase-setup/17.-subscriptions-setup/17.2-ios-setup.md).
# 17.2 iOS Setup
## Sign A Paid Application Agreement
The first and foremost thing you have to do is to accept the agreement. Go to **app store connect -> Agreements, Tax, and Banking**. You will see two agreements. One for Free Apps and the second for Paid Apps.
Free apps agreement doesn’t require you to add your bank account and fill in the Tax information, but Paid Apps do require. You need to accept the Paid Apps agreement. Once you accept the agreement and fill in the necessary information, your status of agreements will be active. Just like this 👇🏻👇🏻👇🏻
## Configure Subscriptions in App Store Connect
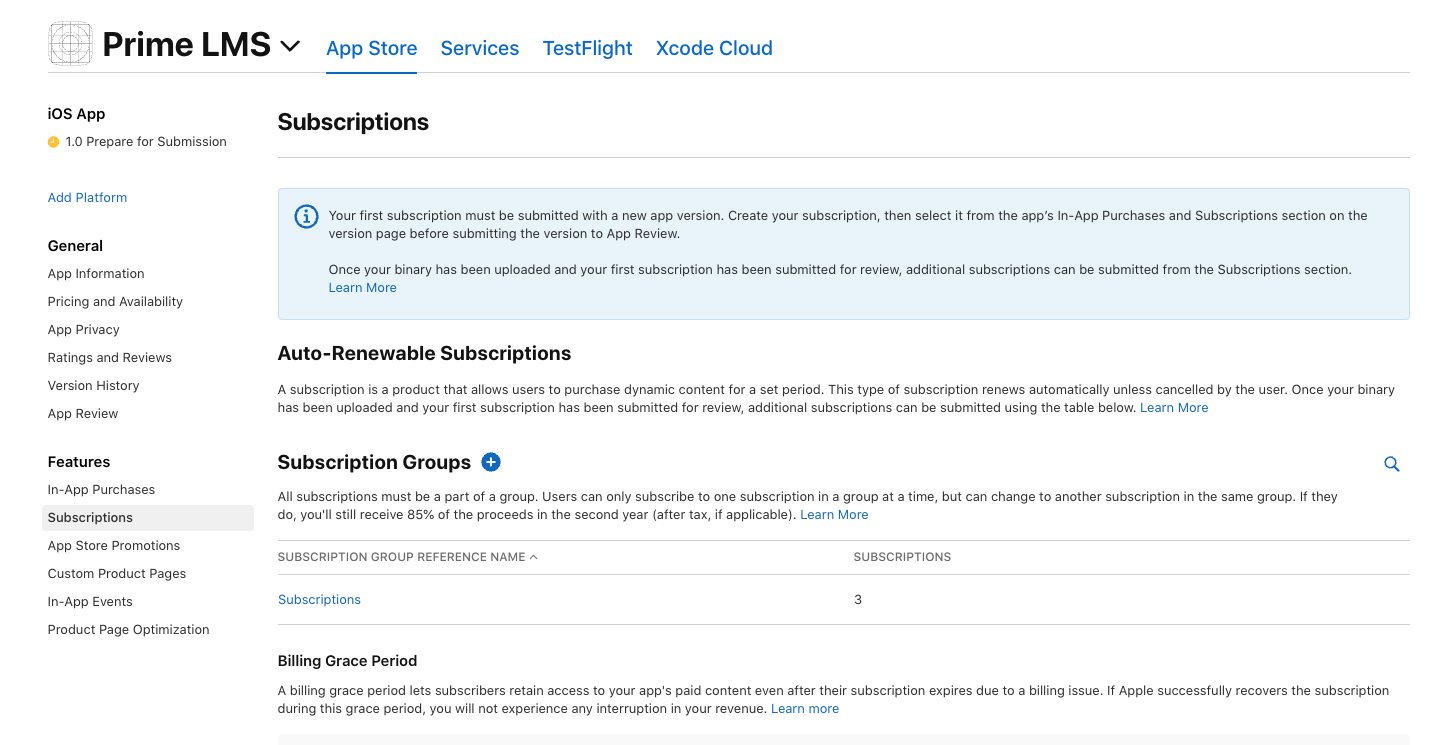
From your Appstore Connect, go to **Your App** **> Subscriptions.**
* Create A subscription group. Group name can be anything. You will create all of your subscription products within this group.
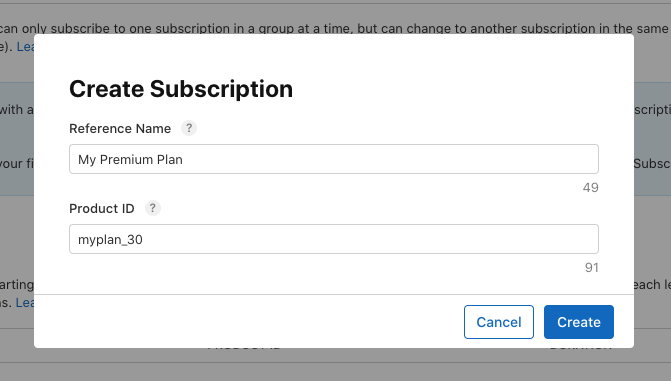
* In that subscription group, create a subscription product by clicking on the + button.
* Enter reference name and Product ID.
{% hint style="info" %}
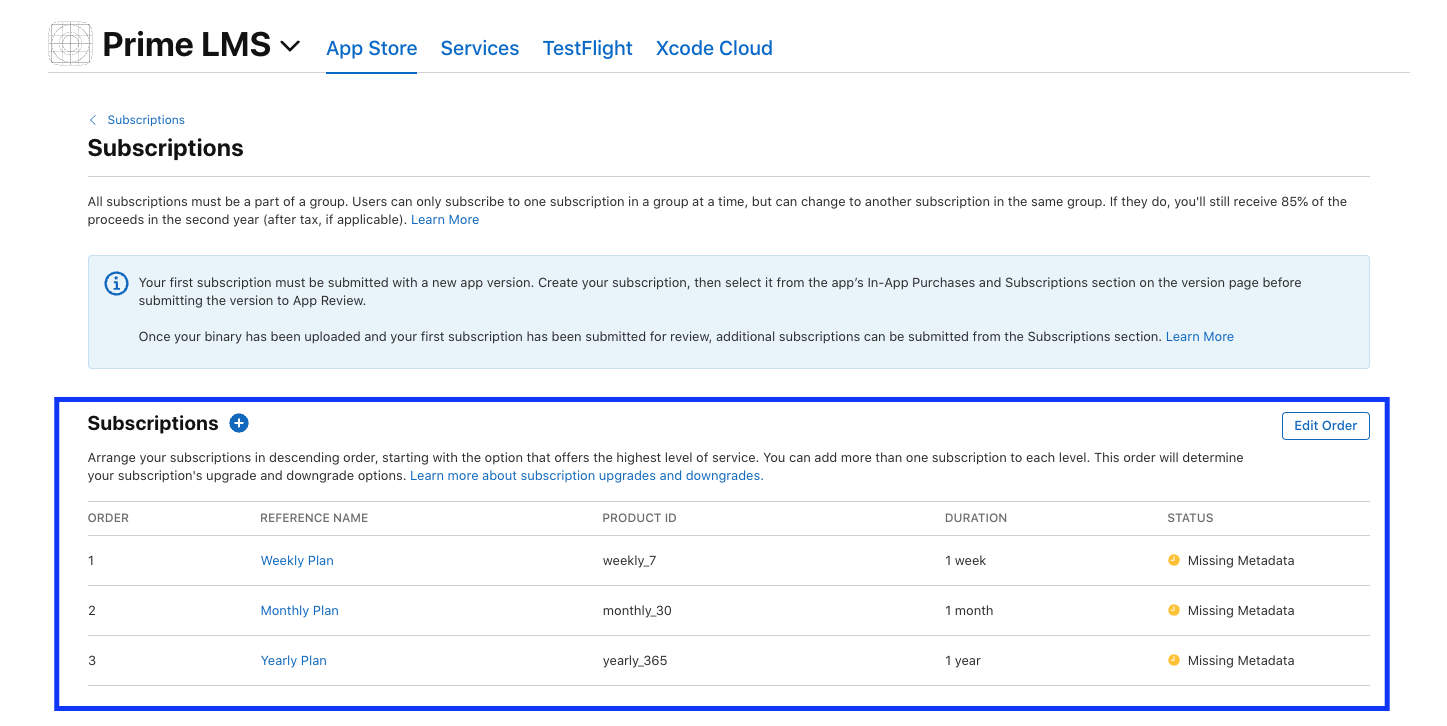
Product ID can be anything but unique. You must add the duration in days in your product ID. For example,
**myplan\_7** (for 7 days),
**myanotherplan\_30** (for 30 days)
{% endhint %}
{% hint style="danger" %}
You can't use any other number in your product ID except the days. Example,
**myplan1\_30, myplan2\_365**
This is not acceptable.
{% endhint %}
Look at the shown below, you will understand how to use product IDs.
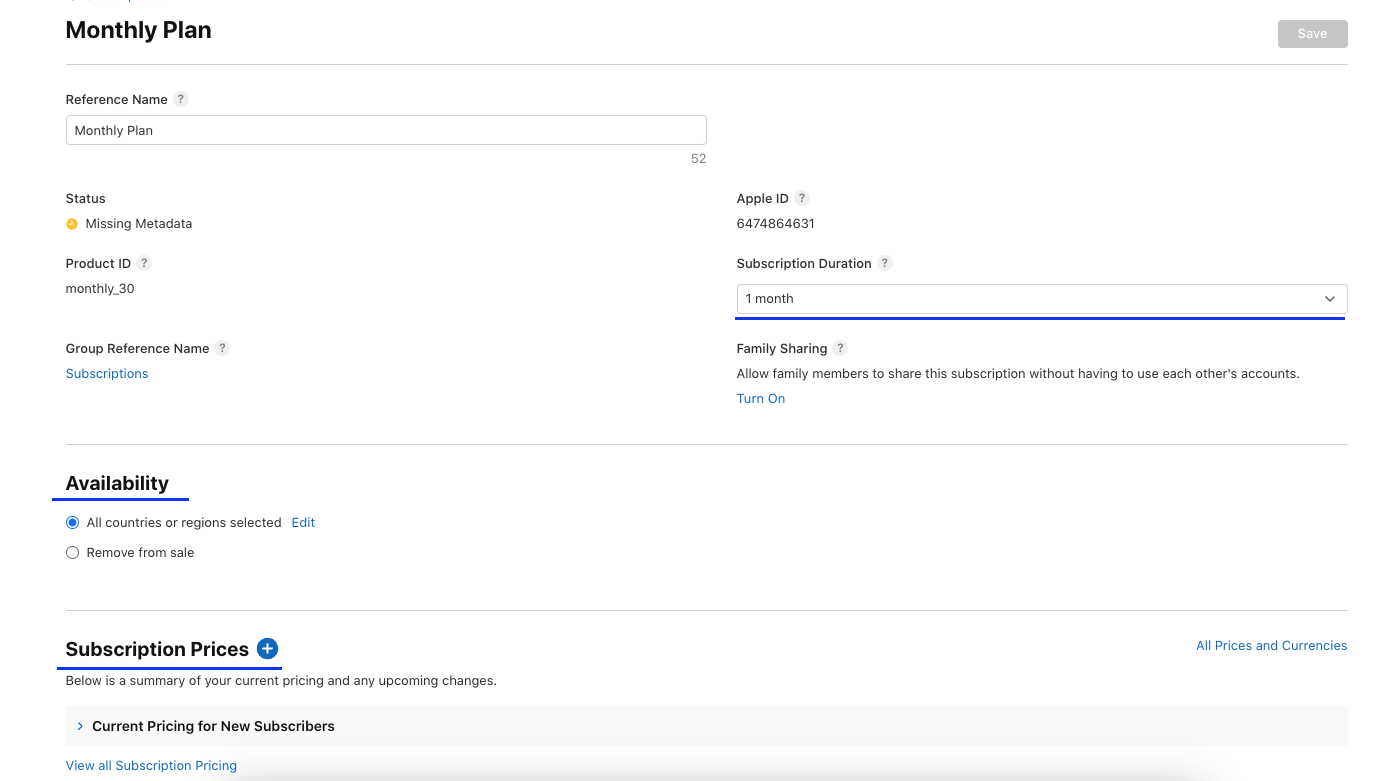
* After creating the product, Select your plan duration.
{% hint style="danger" %}
Plan duration must be aligned with your product\_id. For example, if you select 1 week then your product ID must contain 7. If you select 1 month then your product ID must contain 30.
{% endhint %}
* Select countries and set prices for your subscription.
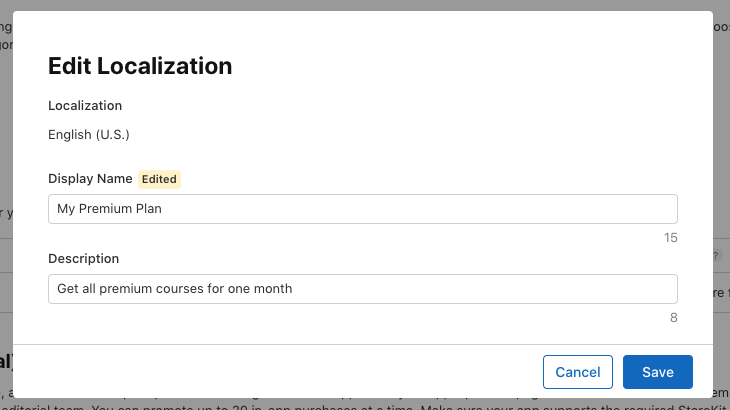
* Add **AppStore Localization** which will be visible to the users.
* Save the product. That's it.
{% hint style="info" %}
That's it. Your first subscription plan has been created. This way you can create as many plans as you want. We have used 3 plans for our demo app.
{% endhint %}
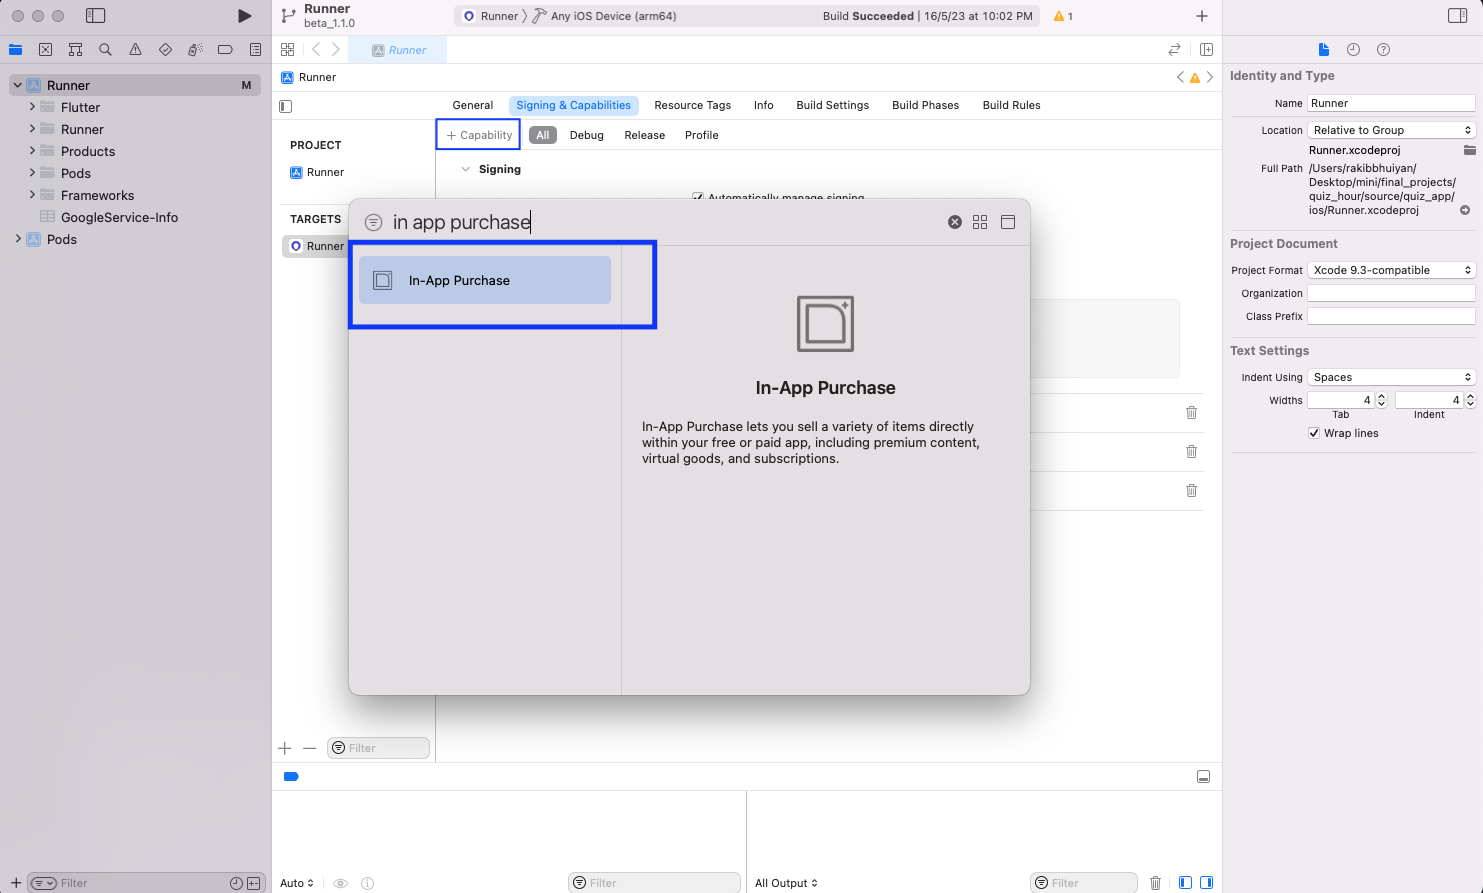
#### Add the In-App Purchase Feature in Xcode
From the app source code open the **lms\_app/ios** folder in your **Xcode** App. Now go to the **Runner > Signing & Capabilities** and click on the **+ Capability** and add the **In-App Purchase** option. That's it.